Chuck

Chuck

Tuesday, May 6, 2014

Microarmor AAR


I just got my orders of Litko markers and a few houses from GHQ. Also my lovely significant other was nice enough to bring me some fleece for game mats; green for grass, white for snow, and brown for mud (...not exactly tan for sand/desert) so we had to set it up for a game.
 
The town:
 
So mini-me and I got to work cutting out some felt strips for roads, and adding some lego buildings to make a town. (North is to the top)
A larger shot of the town, note the tall "clock tower" in the center built by mini-me.
 
The Forces:
Force A-mini-me: is comprised of sixteen tanks: 6 Panzer IVs, 10 Shermans.
Force D-me: is sixteen tanks: 8 Panthers, 8 T-34s
 
A lovely mix of armor. Obviously we're not intending to be historical....this is for FUN!!!!
 
The Objective:
Force A is to make it through the town, Force D is there to stop them.
 
The Rules: keep it simple
The Panzers & Panthers are considered heavy tanks. They move 3" per turn. Score a hit on 4-6. Armor saves 4-6.
The Shermans & T-34s are considered light. They move 4" per turn. Score a hit on 4-6. Armor saves 5-6.
You can move and shoot. Fail your armor save & you're dead. Shooting without moving gives you +1. Shooting is line of sight. (Weee! Get the laser pointer out!!!!) Moving off roads slows you 1". Partial cover gives you +1 to your armor save.
Roll to see who goes first each turn.
 
Force A approaching the town from the west. All they can see over the hill is the clock tower. They know the town is heavily defended


6 Panthers are strategically located behind buildings throughout the town while the T-34s patrol the streets. The other two Panthers are positioned on a hill to the south.
 
Force A sends four Panzers over the hill to recon. He spots the Panthers on the hill and fires, unfortunately missing.
The Panthers return fire and score a hit!


The Shermans come racing over the hill, while the Panthers fire again scoring another hit on a Panzer.
Two T-34s move into position and take out one Sherman.
 
But not before they take out the Panthers on the hill. Mini-me is keeping all his tanks together and the concentrated fire is devastating.
After taking out the Panthers on the hill the Shermans continue to advance. A Panther moves out from behind a building and takes out one of the Shermans while the T-34s on the north flank take one out as well.
 
As the Shermans move through the south part of town the remaining Panthers & T-34s are moving to intercept.
The Shermans continued to advance in their straight firing line formation taking out the T-34s on the north along with three more Panthers that came out of hiding to fire. I told ya the concentrated fire was devastating.
At the bend in the road the Force D catches the Shermans in a killing zone. Lots of shooting!! Lots of destruction & fire & smoke too. Heavy losses on both sides.
One lone Panzer had stayed back out of the town. The late-comer to the party later took hits from both the Panther and T-34.
 
The last two Shermans break out of the killing zone and make a run for it.
 
They didn't make it.
End of game.
At the end of the game I was left with 3 Panthers and a T-34. Mini-me still had one Panzer left that had moved into position on top of the hill to the south -  the original position of two of my Panthers.
 
Lots o fun!


Sunday, April 27, 2014

213 Squadron details -- almost done

Finally finished up the black bits of camo and worked some on details. I cleaned up some edges and some messy spots.
 
Took them outside for a quick coat of gloss. Personally I don't like the gloss finish, and once they are finished they won't be gloss. To me gloss is only for surfaces that should look wet or maybe a shiny leather kinda look. But I've read on some modelling sites and the recommendations with a decal set I got for these suggested applying them to a gloss coat finish.
 
 
More shots of the details...
 
Webbing on the #1 plane's cowling.
I also added the flying & landing wires, and drilled out and inserted some gun barrels on all planes.
 
 
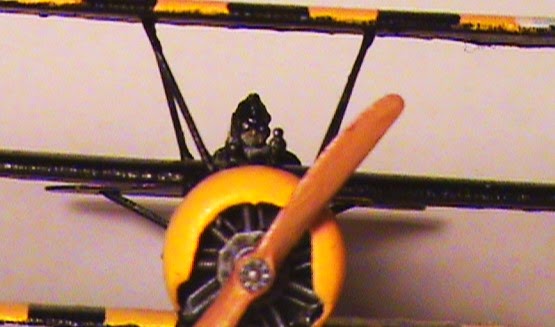
Next step is to put the top wing on, decals & undercarriage. After that, a shot of flat clear and decide if they need pilots.
 
So until next time, thanks for looking.


Monday, April 14, 2014

213 Squadron - the paint scheme


I finally got started on the painting!!!!! All parts were primed with Tamiya grey primer before assembly. The colors were put on in two thin coats except for the last one...more on that later.

I started off with light brown: Model Color Light Brown


Next, light green: Game Color Camouflage Green


Then comes dark brown: Model Color Flat Earth
 

If you were paying attention you will notice I also went back and added the light brown edge to the Bleriot scheme upper wings (the two on the left...how did I miss that?)

And things are going along smoothly until my dark green decides to act like an ink wash.


Game Color Dark Green. This had to go on in four coats. It just wouldn't mix in the bottle, don't know if it sat too long or what happened. It was fine painting some orcs around Christmas time.

I know these pictures aren't the best quality but it lets me get away with being a little sloppy on this stage. The next task will be black, details of the cockpit, struts, and clean up/touch ups.

Until next time here's Ernst Kessler


Tuesday, April 1, 2014

213 Squadron - back to work

Finally back to work on 213 Squadron. It's been a while since my last post because real life kind of got in the way, but I'm back at it.

I got the rigging on the struts done and now it's time to fill gaps and clean up other spots.


You can see I've got my work cut out for me.

I knew there was going to be a lot of work but now that I'm at that point, this is kind of ridiculous.


I got out my Tamiya model putty and started slapping it on where I needed it.

Now that I've done it, maybe I should have gone with brown stuff or green stuff. I had a real tough time with the putty. I had used it before on a 1/48 F-18 to fill in gaps and it worked okay.


This time I had trouble with it drying out and crumbling before I could get it in place; note the chunks around the exhaust pipes.


So after a lot more work than I anticipated, the gaps are filled, extra putty trimmed & sanded off, and they are ready for the next step...LET'S PAINT!!


Underside first. Yellow or gray...I went with Reaper's Golden Highlight from their skintone triad.

Next, pick the colors and start on the top. So until my next post.....

Thanks for stopping by.

Wednesday, March 5, 2014

My micro armor

Here's a bonus post since I actually missed one a couple of weeks ago.
Last year Military Channel was running a Saturday marathon of Greatest Tank Battles and I had to get some tanks. Not just some tanks, a lot of tanks. But I'm very limited on space and funds so micro armor is the way to go.
I just finished a small terrain board that I think looks great for this scale.
Not just Panthers, the battle in a box comes with some Soviets too!


Tuesday, March 4, 2014

The project: 213 Squadron update

After a small disaster I'm back at work on the rigging.

I got all the interplane struts done and also got the props painted up. Most of the rigging so far has turned out satisfactory. Here's a close up:
(Well a small close up. Any larger and it looks all fuzzy.)
 
I also started cleaning up the upper wings. You can see Lt. Richardson's wing at the top. (see the January 18th post if you want to know why it's different) It turned out really good. I'm happy with it.
 

I've heard of people using jigs to mount the wings but I've never really got the hang of doing that. So using a little tape I attached the struts to the top wing, and glued down the struts to the bottom.


After my disaster with the Kragl I've gone back to my friend Gorilla Glue. It's strong, the bottle doesn't gunk up, no squeezing necessary to control the flow, it stays liquid in the bottle for a long time, and best of all there's a picture of a gorilla on it!
So once they're all set, I can remove the top wing and Everything is Awesome!
Down at the left you can see where I traced the ends of Lt. Richardson's wing to make sure they are even. Yes they are.
I also have the cowlings & propellers mounted.
 
Now to fill in some gaps and start the fun part....Painting!!!