Chuck

Chuck

Sunday, August 23, 2020

PZ. III pt. III Finished Project

 So we looked at all the build and now it's time for finishing and putting it all together.

As mentioned in the previous posts, the arch and sidewalks are cast plaster bricks using Hirstarts molds. The walls are made out of foam core board. I made the building trim, window frames and sills, and the shutters out of matte board; the kind used in picture framing. The street stones are some rubber craft rolls that have been painted. 

A word about the shutters, they were pretty tedious. I cut out and glued each individual slat between two cut out frames. I think they look really good though and glad I did it that way. The drain pipe is just a piece of sprue from the tank kit with some plasticard pieces for the brackets. The lamp turned out pretty good for being a half a tire from an airplane model, a costume bead, and a piece of copper wire from an Easter egg dyeing kit.

But we're not finished yet, lots more dressing to do....

I found some Greek poster thumbnails on the web to use for (of course) posters and the cafe signs. I used wall spackle to buildup my rubble piles. I wasn't too sure how that would work out but I like it. I will definitely be using that again for stuff. Add some more broken plaster bricks, broken stir sticks and tooth picks, some other weathering here and there and IT'S DONE!!


I also broke down and ordered a cafe set (tables and chairs) instead of trying to make some from scratch. I thought about it. The set also came with some bottles and true to form I put one on the sidewalk behind the tank so you will only see it in the above pic or if you see it in person. Always doing work and details no one will likely ever see.

The base on this is a little too big to go on any regular shelf and as I may have mentioned before I'm a little limited on space. So I found a place in the house and bought a new cabinet. (and I can fill it with more stuff! 😁)

Just a few more photos of it in the case to finish this off....
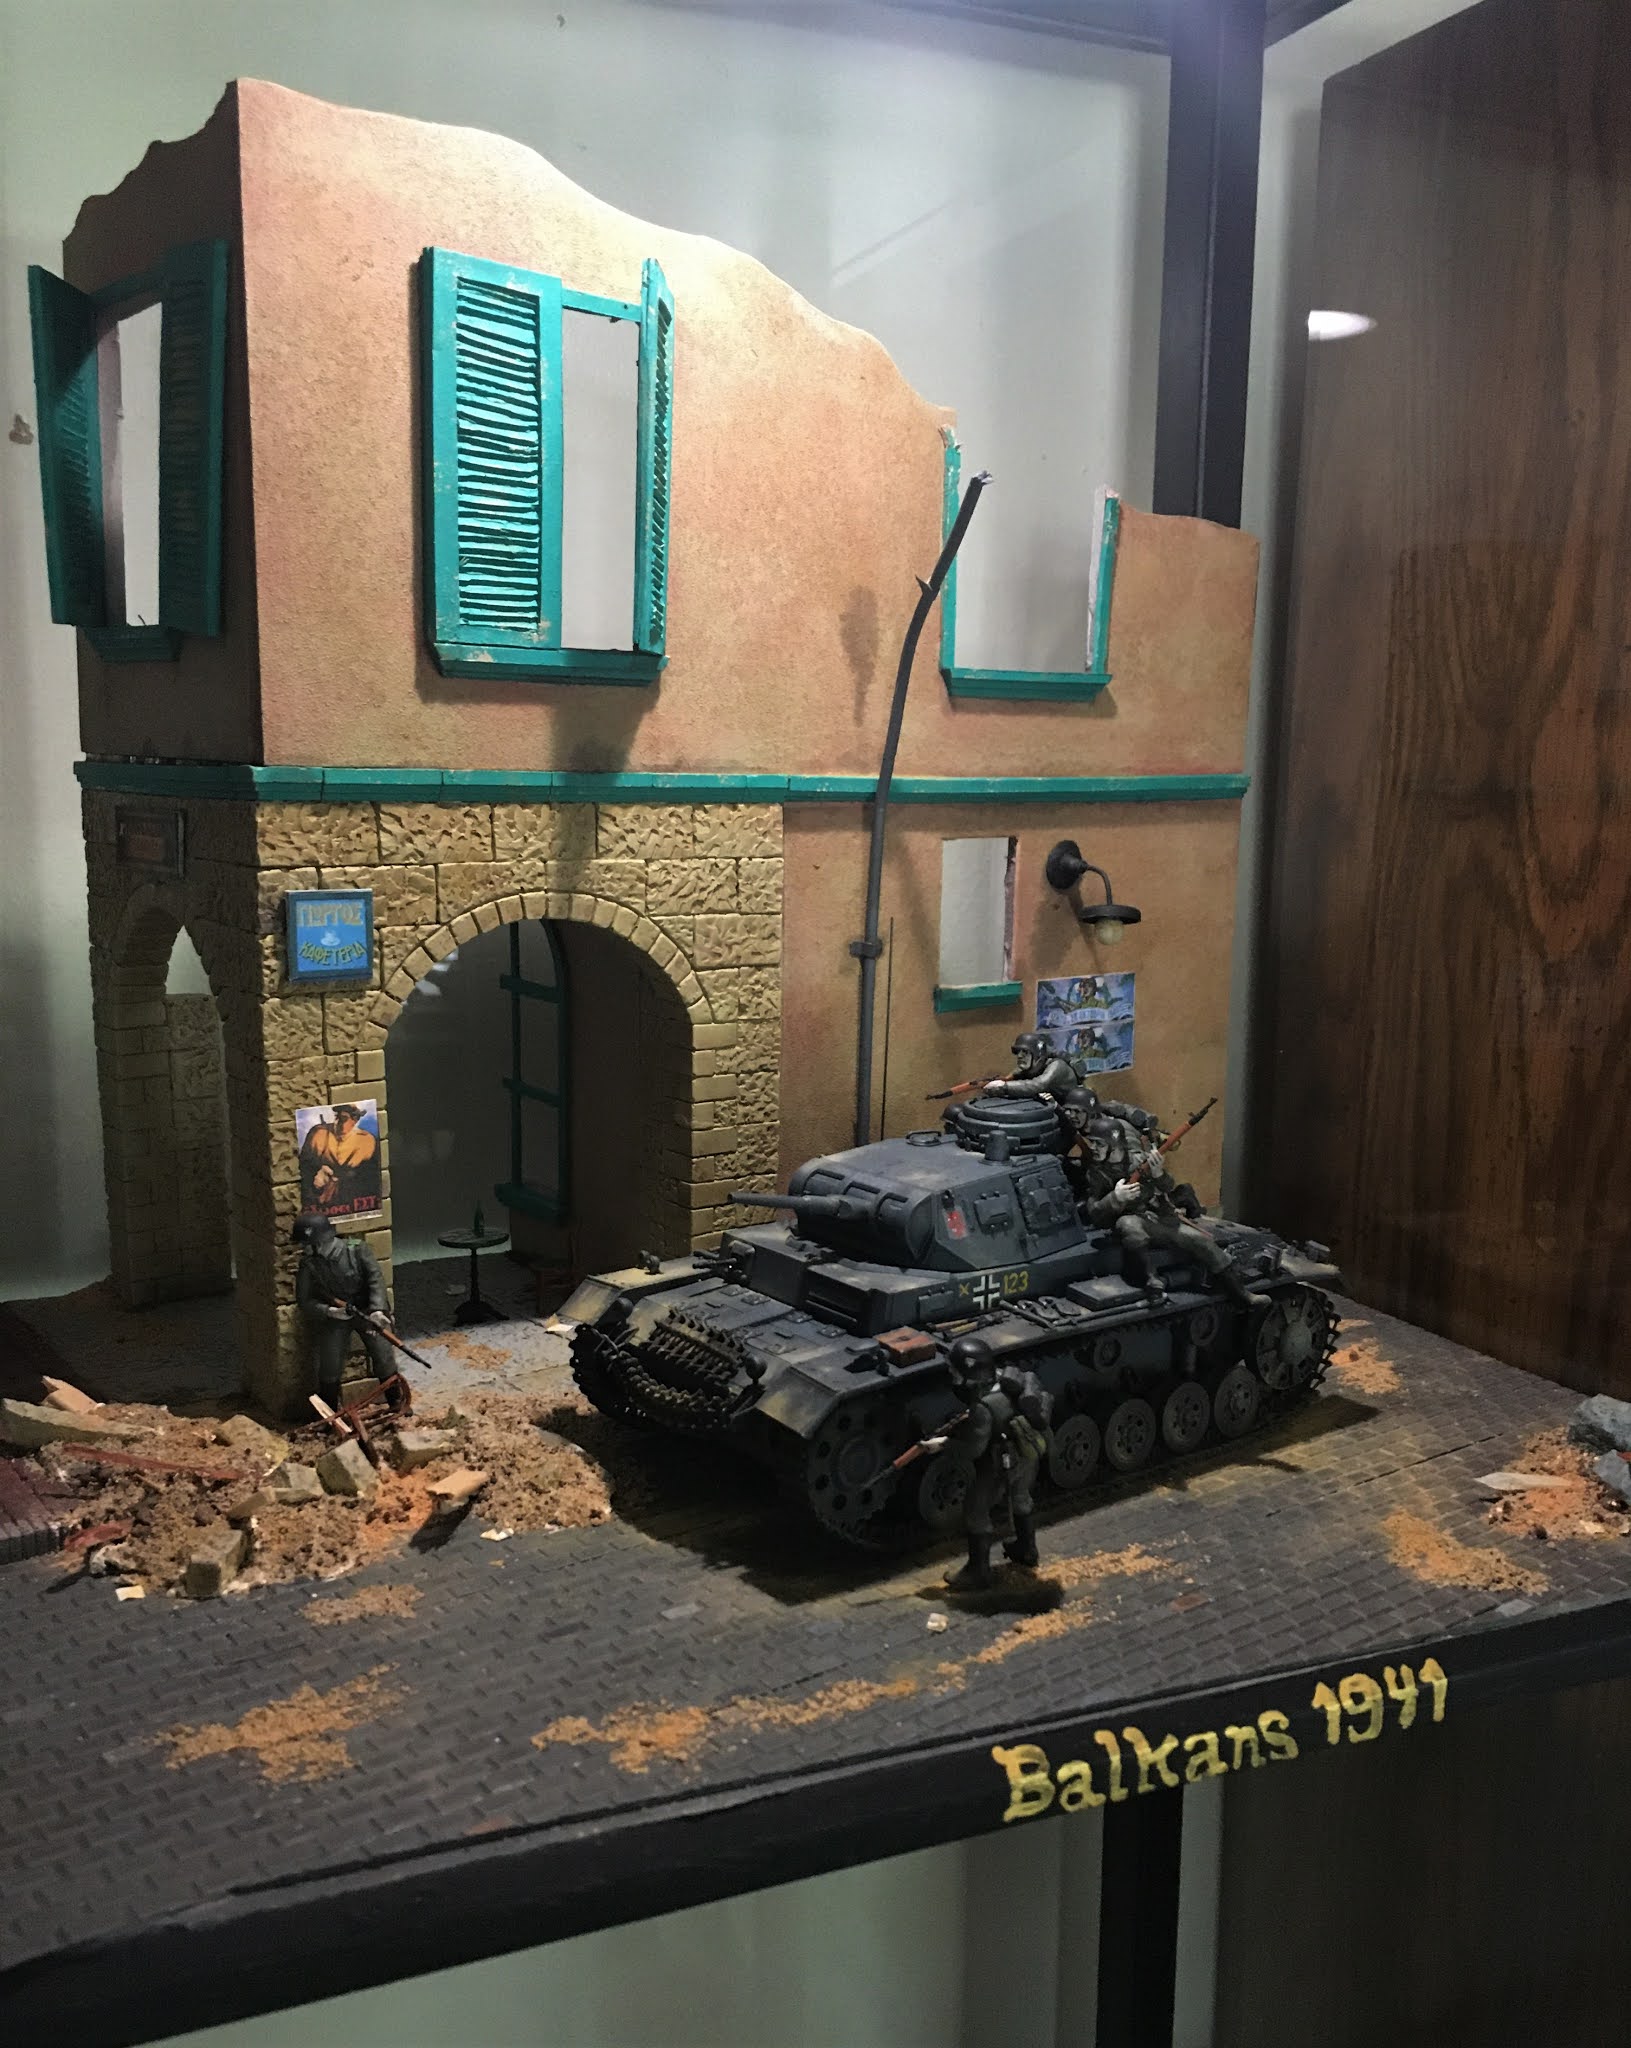


You may have noticed I re-arranged the figure placement from my original plan. 

This guy made it look a little better being away from the tank and this is one of my favorite photos just by the way it turned out. You can see someone was having a drink before the Germans arrived. And you get a better look at one of the rubble piles.


So that's it.

Let me know what you think and I'll have more up soon.

Thanks for stopping by.

Wednesday, July 29, 2020

Pz. III pt.II

Last time we had finished the model build.

Now time to do the figures.

I looked through the decal and painting options on the tank and decided on the Balkans 1941 and did a bit of brief research.


Nope, going to stick with grey.

And decide on some placement...pretty much straight off the box suggestion. It just works really well.


Primed
And painted.


They turned out pretty good, I just had one complaint. I know they are supposed to be battle hardened veterans but they look so OLD> I mean retirement age old. Oh well, as long as you don't look at the faces up close it's cool.

Now time to build the set.
Drafting the idea and figuring placement...
I have an old award plaque that was going in the trash at work from years ago that is going to make a perfect base. This is going to be a city/village street and cafe scene when it's all done.


So I grid out the base..
And start casting bricks with my ancient Hirstarts molds. The molds are ancient, I've had them for at least 15 years and have cast hundreds of bricks with them. Still going strong.
The beer is for drinking not mixing in the bricks. ;)
Only the corner arch and the patio are going to be plaster bricks.
 And a test fit to see how it is all going to lay out in reality.

 The street is some rubber brick scenery stuff I picked up on sale from the craft store after a Christmas some years ago. I didn't want to go through molding or carving cobble stones out of plaster. That would make it way to heavy and I really wanted to keep it simple if possible.
 Walls are foam core board. And I have plans for a few other detail dressings.
One look at the base coat
With a smaller scale sherman in the background. It was just there. We'll save the finished product for next post.
Leave some nice comments if you wish and
Thanks for stopping by.

Tuesday, July 21, 2020

Pz. III pt. I

Well June kind of got away from me. I really was meaning to get a post in but I was too busy doing a project.

What project? you ask....


I got these figures because I needed another helmet for some other figures I got a while back for another project which we'll get to later. -runon sentence much? So naturally I had to come up with something to do with these guys and then I found this Dragon model for not much $$.

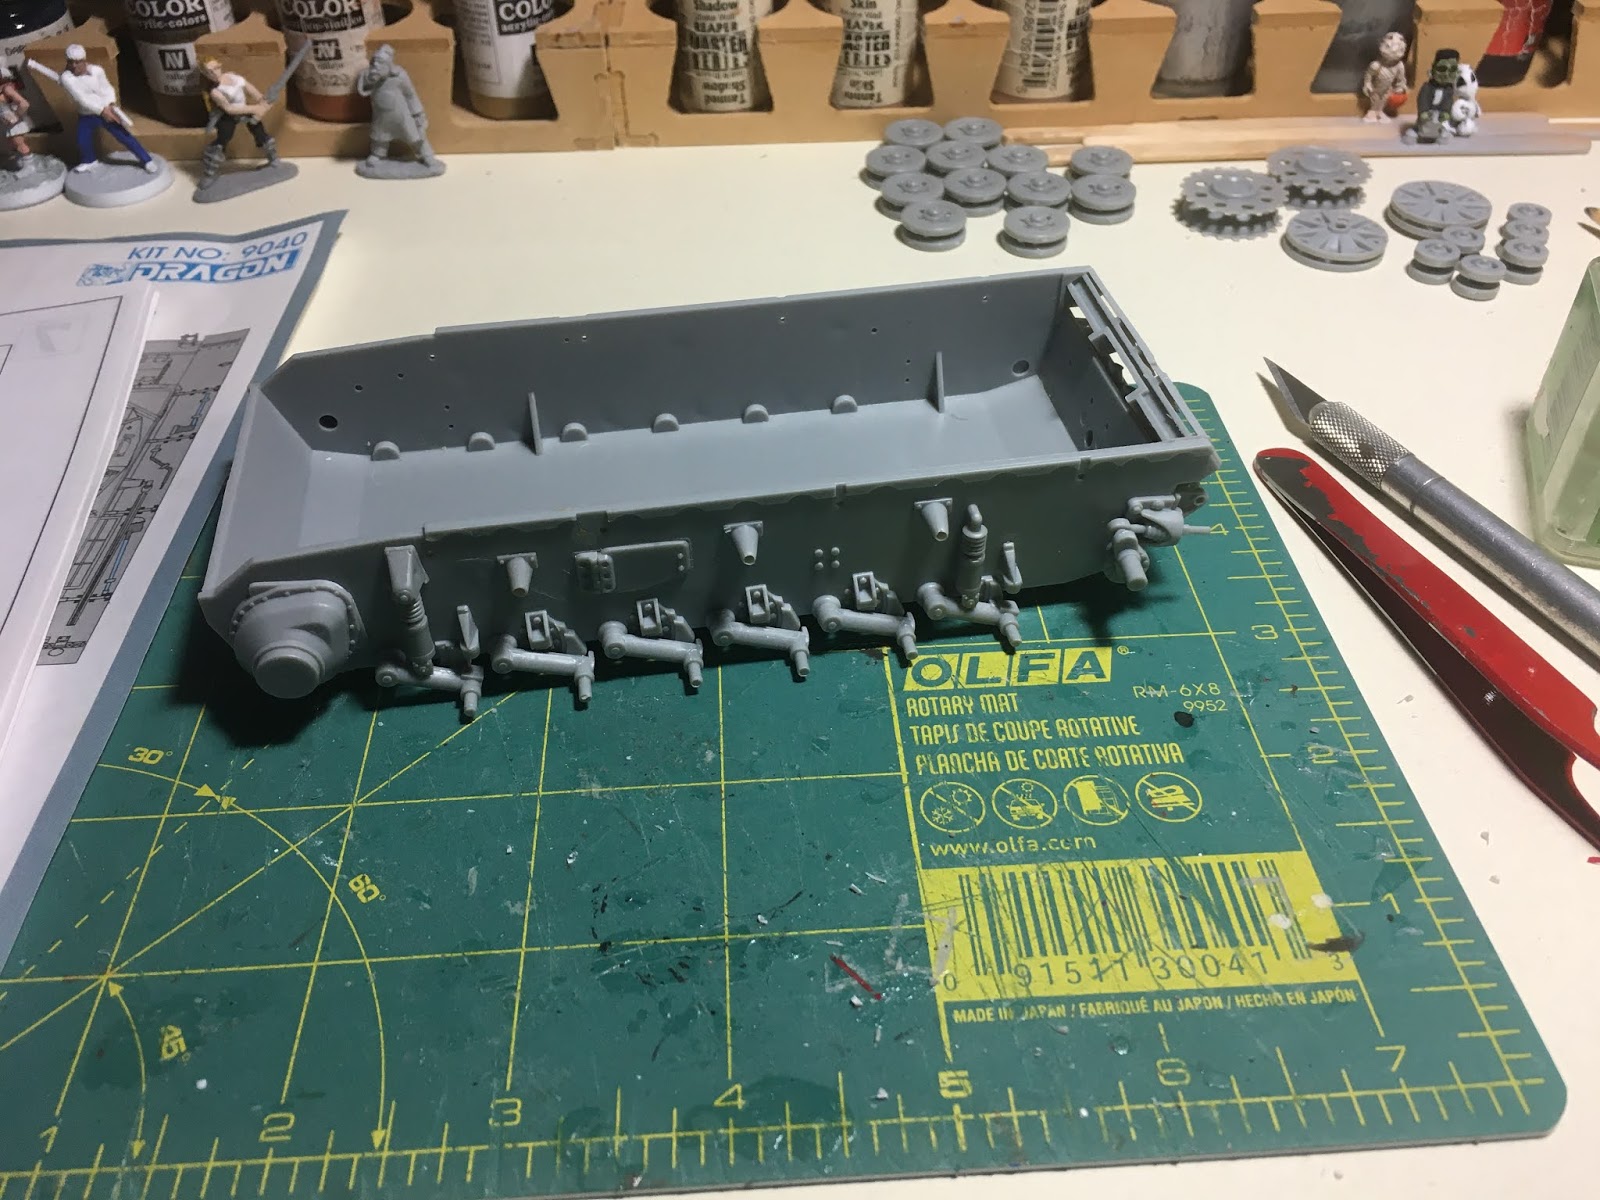
Let's dive right in to the build. It wasn't all that difficult a model. Flash and vent marks (or whatever the technical term for it is) were quite common though. It made some of the pieces hard to identify.

Here's just one example. There was lots of clean up but with a sharp blade and a fine sanding stick it didn't slow me down much.

It also came with a TON of extra parts. There was one sprue that I think only two pieces were needed. I ended up with practically a whole second turret in the spare parts!


Assembly was pretty straight forward. Here's the hull and wheels in the background...


...the upper deck and fenders...


                     ...and finally the turret and gun.

This next part really scared me. Dragon Tracks! I had never encountered these before. Of course I had seen them and knew some kits were made this way but I had never assembled tracks one individual link at a time before.
I was really dreading this part. Look at all of them! But like I said, with a sharp blade it really didn't take too long to get them all cut out and cleaned up.
There were like 180 or so of those suckers! And yes I ended up with a hand full of extra when it was all done. I wasn't sure how to go about this so I looked it up the YouTubes. There are quite a few tutorials out there and they all pretty much follow the same process. Use a straight edge, build in small pieces, take your time, and then assemble the small pieces into just two parts before final attachment on the model.

You can see in the upper right where I got it in to two pieces for one side. I ended up really liking these much better than the single rubber piece you find in some kits. I think you can get a better fit with these and to me it was a lot less frustration. Plus it holds shape and you can make it look more weighty before you get it on the model.

Next we're on to painting. I've been watching all kinds of YouTube stuff and found Panzermeister36. He's got some really good weathering tutorials. He does lots of German armor. His vids are really easy to watch and I like his attitude and presentation. He explains things really well and has some really good end products.
So I took his advice and primed it all in black.

Then using his recipe for panzer grey I got a very good result. Thanks Panzermeister36!


Next post I'll show you the rest.

Thanks for stopping by.

Wednesday, May 27, 2020

Tale of Two Planes II

Now on to the Emil.

I didn't take a whole lot of pictures through this build. I guess I was just too focused on the building and painting.


I couldn't find my sticky notes for masking this time around so I just went for the painter's tape.

First pass was the basic grey and taking a shot with the mottling. We'll see how this turns out.


After adding the violet/grey it didn't turn out so bad.

On this close up you can see I did have a bit of misting overspray.

Also added the red spinner, yellow on the underside of the nose, and a gloss coat so it's now ready for decals...


And finally here's the final product. I used panel liner for this one with no pre-shading. It is very subtle but I think it turned out really good. Even in looking at pictures of real planes you really can't see all the panel lines so not having them overly exaggerated suits me just fine.

Then I decided I needed a base for them so I built a "concrete" pad using an old piece of wood that was laying around and some plaster.


Sanded it flat, painted it grey and here it is...


Thanks for stopping by.
I'll have more to come soon.