I finished up a new Halloween decoration!!!
I've had these figures for about two years. It was supposed to be a finished project for last year. But of course that didn't happen the way I planned. You may have seen some of the little guys on the work bench in other posts.
I'm finally getting the base built.


Concept drawing for the cottage.
I made it out of foam core and matte board. Pretty simple. The hardest part was figuring out the angles for the roof and gable. I made an actual wood door with craft stix and the head of a push pin. The porch and gable supports are plaster bricks.


Save that packing material!!! Reuse!! Recycle!!
The roof was some textured, model railroad, styrene sheets.

Now for some landscaping using wall spackle for garden mounds, ground coffee and sand mix for dirt, and some natural stones.

 Primed
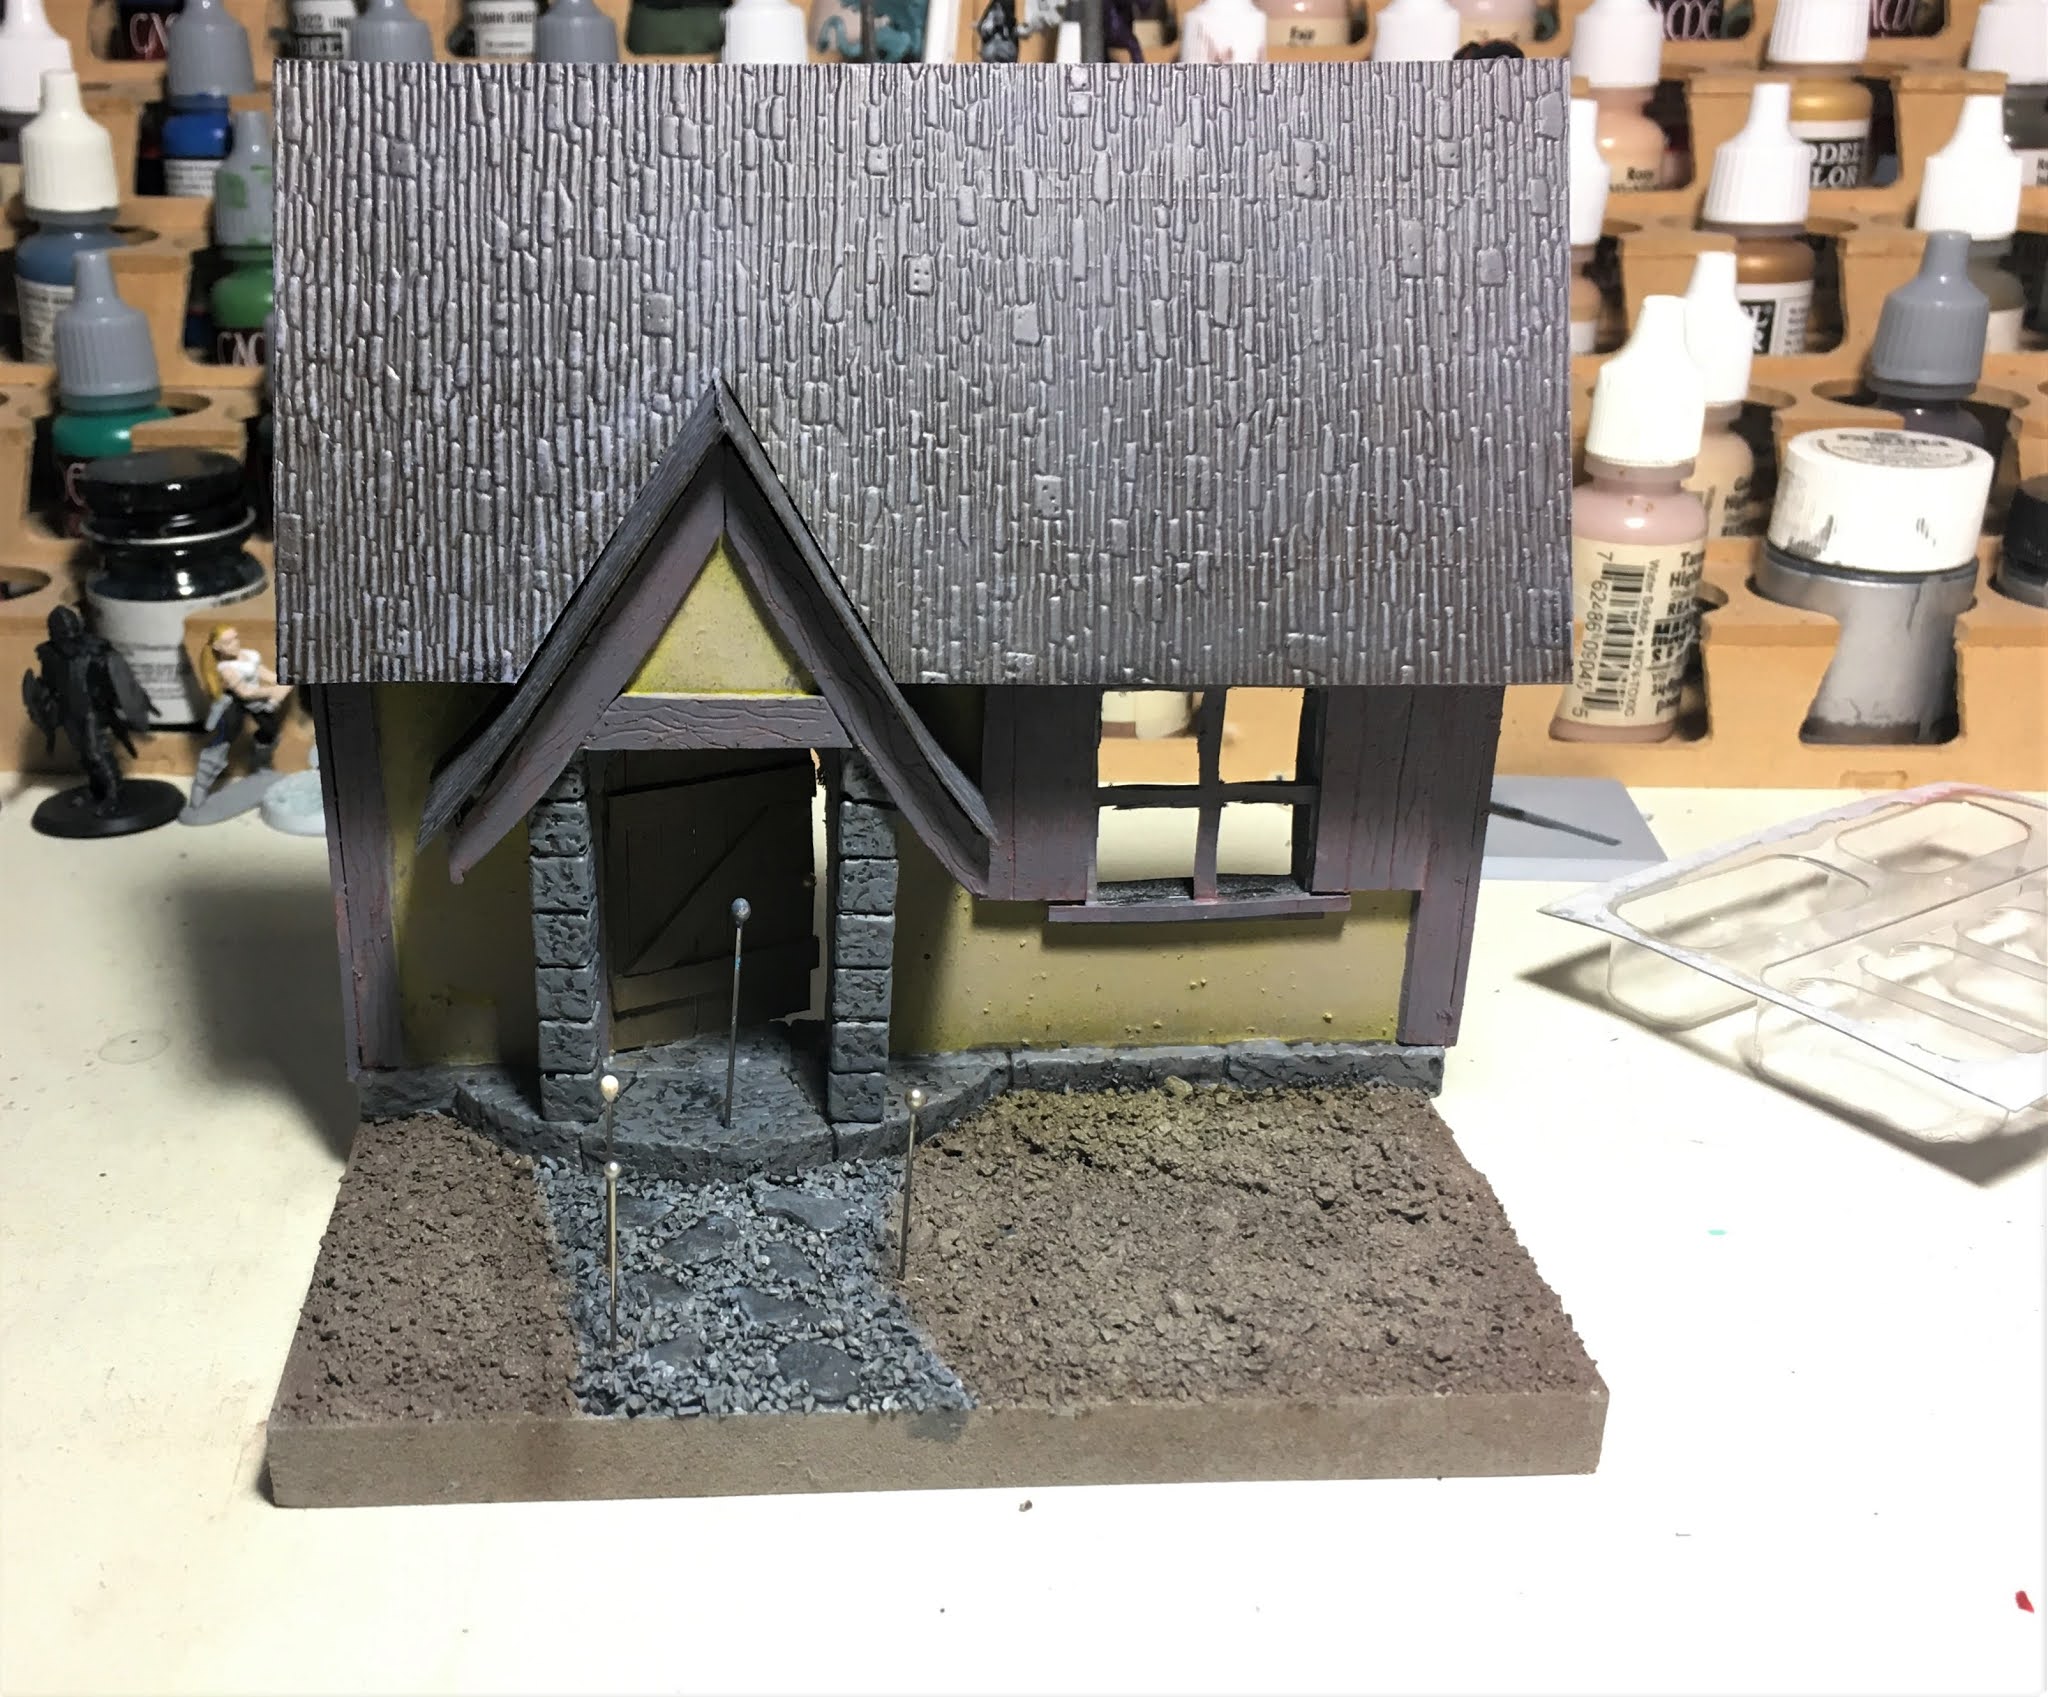 Painted
Then add the foliage.

Thanks for stopping by.
Happy Halloween!
🎃🎃🎃🎃🎃🎃