Chuck

Chuck

Wednesday, November 3, 2021

Day or three late October update


Totally missed posting on Halloween! 

        Busy Trick Or Treating!


To make good on my teaser from last post, I worked on some of my Brexit minis.

Did I tell you about my Brexit minis? 

Way back, however many years ago it was when the Brexit was first announced, the exchange rate went way in favor of US. How can you pass up a chance like that? So I spent a bunch of US on a bunch more UK worth of Hasslefree minis.

If you aren't familiar with them, Hasslefree Miniatures (hfminis.co.uk) Lots of great minis. Good sculpts, good service, all round great company. I love these guys.

So on to what I've been painting.......


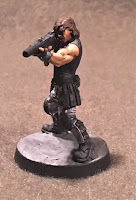
First up...not Snake Plisskin


I like this guy. Turned out great. He's named Cobra in the Hasslefree store. A bit more ripped than Kurt was but he's probably okay with that.


Next up is Lord Ulthrak

This is one of those minis that you typically see in dark colors, reds, blacks, etc. So I decided to do something different. 


I did find some green metallic paint. I had some green metallic from the old Reaper paint line but it finally dried up after 7-12 years and it's discontinued. AK makes some color metallics. I used emerald metallic for the magic axe and a beryllium glow for the helmet horns and some other highlights.


I attempted some OSL glow for the axe. My first real attempt at something like this. It didn't turn out all that great. The bit on his knee armor is okay but I am really disappointed with the hand. I was really scared of overdoing it and just got to that point where I had to say "STOP! before you screw it all up!" 

Overall it's still a good looking mini and I like the white armor to be different from the typically darkness I usually see on minis of this style.


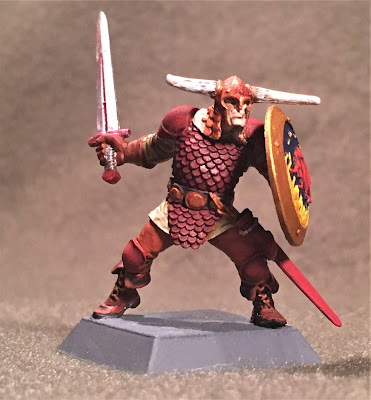
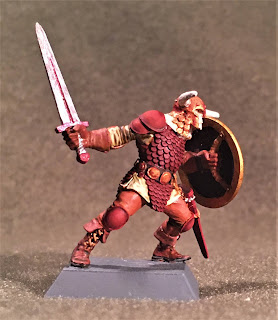
Finally is Gillermo
He's kind of a monochrome study in red.


I primed his using the red primer from the Ork Trukk instead of my usual grey primer. I guess that's what gave me the idea to go with a real red theme on him. I've got to use up that primer on something.

Oh yeah...and a bit of RedBull inspiration for his shield:


So that's what I painted up this last session.
Next I'm working on a project that I've been wanting to do for a long time in the same vein as my Phantom vs. Mig project. Not sure if I will have it all done for presentation by end of November but I will have something to post for sure. 

Until next time...one more of Not Snake.

Thanks for stopping by.


Sunday, September 19, 2021

Ork Afrika Korp

 Along with my Ork Trukk from Kromlech I also got the Afrika Korp troops. Plus some extra bodies and arms to go with all the extra heads I have in the bits box from other stuff.

I was going to make this a totally separate project but since I already had my trukk crew to paint I went ahead and did the whole unit.

Somewhere I read an article or saw a YouTube video by someone showing off their Kromlech minis. They mentioned how large the heads were and that made it difficult to paint the figures once they were fully assembled. I started looking at how these would go together and yes there would be some difficult parts to reach once fully assembled. 

So using some white glue I started putting heads on sticks.


Then assembled the bodies and arms and bases separately.

For basing I have a bag of coarse coffee grounds that I used for a rocky kind of terrain. It's already been used to brew the coffee so there is not really any waste going on. 😁


There's a bit of headhunter totem effect going on here. 

I have my own ork flesh recipe that's a bit of olive and earth brown. It keeps most of the army consistent with still a bit of variation here and there. 


I really like these Kromlech minis. The heads especially have a LOT of character. They are much bigger and definitely a different style than the Games Workshop 40k minis. 


I bought some Panzer Aces Afrika Korps uniform paint specially for these guys. It's a pretty cool tan/khaki color I'm sure I will find a use for in other things as well. Once I got it on, I then noticed how close it is to my ork flesh recipe.
There's still enough differentiation to see a difference. The skin tone is a bit more green. It worked out well.

And now the finished product:
The Unit Leader


Heavy weapons

I like this guy the best. He's definitely crazy. Just look at the one eye.
I'll say it again. All of these heads have a LOT of character.


And finally, the whole unit:


Well, thanks for stopping by again.
Leave some comments if you like.
Until next time.....
here's a preview:


Tuesday, August 31, 2021

ORK TRUKK

 Time for the August update on what I did in July. Never did get back to do another July post. I was really too busy on this build.

I've been looking at getting some Kromlech Orks for a long time and finally broke down and spent the money on a trukk.

It took a bit to get here coming from across the big pond and all but I think it was totally worth it. You can judge for yourself once you see the finished model. It came in a big bag with no instructions. Well there were instructions for cleaning and gluing resin parts but no real assembly instructions.


That's okay. Most of the parts were pretty obvious it was just the little parts that I was really unsure where they should go. That's cool though because you can completely customize it however you want. There were options for a flat hood but since I wasn't going to paint it red I went for the turbo dragster look with the blower. 

There was a lot of flash and some big chunks that needed to be removed. Zoom in on the picture above and take a look at the two big poles coming out of the front of the cab! I thought just for a second I may leave them there and sharpen them up but...nah, I like the front grille look better. 


Once I got it all cleaned up and did some test fitting it was time to prime. I've run out of grey primer, my favorite, and decided what the heck I'll try the red primer. I used bit of white glue to put it all together to get a better visual of what I was working with. Then I will disassemble it for painting.

The back hatch had pins so it could open and close but there was no real catch to keep it closed. Bring in the magnets! I cut the pins and replaced them with magnets and inserted one on the body of the trukk to keep it in the closed position.

It worked out really well.

In the test fit I noticed that the cab will be quite crowded once you get the driver and gunner in there. There is some really great detail on the interior and I didn't want to put all kinds of work in on the cab and the figures when you wouldn't see any of it so I magnetized them as well. Make 'em removable.


It's now time to disassemble and start the painting some pre-shading and base coat of dark yellow.

I masked off the interior to prevent overspray of the red and grey camo pattern... 

add a smoke wash, the same dirty dark brown I used on my micro armor....


and time to paint the interior details:


I told you there was some good detail inside the cab.
One last look before permanent assembly. I wanted to add a severed head hanging from the center like fuzzy dice but there just isn't the room once the crew gets in there. Too bad 😕

Once assembled it's chipping and exterior detailing time.

It looked pretty good but it needed something else = a banner!


From here on out I think I'll stop the commentary and just post the final pictures.


Well that's what I did in July. Hope you like it, leave a nice comment if you like.
Thanks for stopping by.