Well I'm back after taking a long break from the blog. I also got distracted by World of Tanks. Totally AWESOME!!! Highly addictive & easy way to burn 4 hours without realizing it.
Of course getting mini-me involved didn't help. He's so into tanks to begin with, and now I think he's better at the game than I am.
We've also started slot-car racing. Lots-o-fun too.
Back to miniatures.
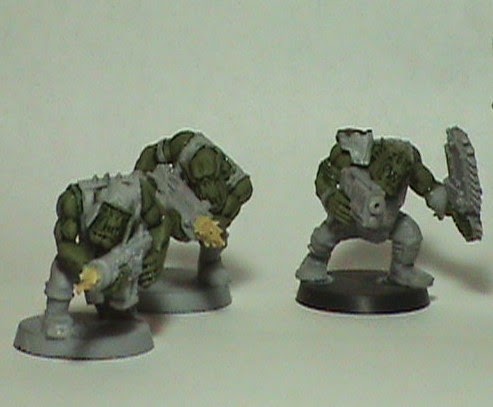
Current project: Soota Boyz
Got them primed. Mixed up my orkflesh recipe. Painted skin.
Orkflesh = olive green:earth brown 12:4
Then magic wash = Dark(forrest) green:black 4:1 with 0.4 ml Future.
Then back to the basic flesh, add another drop or two of the olive and build up the highlights. --Not too much. Keep it subtle.
Next step: start on the clothing.
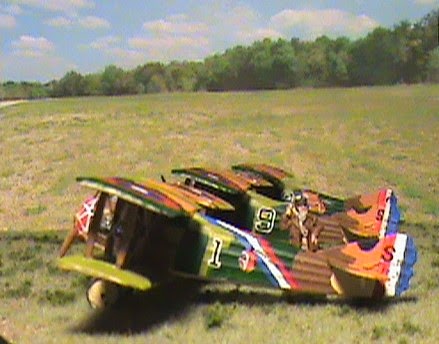
In the meantime, here's a couple of shots of my version of Elric:
Chuck

Tuesday, October 28, 2014
Wednesday, July 2, 2014
Eisenkern Stormtroopers
What have I been up to since 213 Squadron?
Putting together and painting up the not Imperial Guard Stormtroopers Santa brought me for Christmas.
These were just so cool looking I had to have them. Thanks Santa!!!
20 in a box and lots of options and good action poses.
Here's the first platoon, assembled and primed, ready for painting.
All the heads in the box were helmeted. I broke down and went back to the hobby shop to get the accessory kit that has the capped head options and other arm and ammo pouch options.
This time I'm going for the look on the box. No decals though, I had to make my own.
First platoon in action
Now taking positions inside the building.
Just a few more pictures....
.JPG) |
| Move out! |
Well that's it. Leave some comments if you like them.
 |
the set.
|
Sunday, May 25, 2014
213 Squadron Finished At Last
When I started I honestly didn't think it would take 5 months to finish.
Working on the finishing touches, I got the undercarriages on, added the final wires of rigging and was ready for decals...
The roundels went on just fine. The numbers (1 & 6) came in two parts. Whose brilliant idea was that? It was a large white decal and a smaller black decal so the result would be a decal on decal black number with a white border. Really?
 |
| Of course you have to get it lined up perfectly. |
 |
| This 9 came out okay, luckily the indian heads all came out great! |
 |
| Actually the 1 was only the black and the outline was done by hand. Also I had to hand paint the stripes as the decal was shredded beyond use. (each one from all three decal sets!) |
 |
| Just to prove I didn't shortcut & finished the bottoms and well. |
So what have I learned from all of this?
- Go ahead and spend the money on a good model kit.
- Don't do more than two at one time. In my life it's very hard to block enough time to get a step done on four models in one sitting; two - chances are good, three - possibly, four - very difficult.
- 1/72 WW I pilots are virtually unavailable. I found the one kit that's out there - only half are in cockpit positions and/or dressed for flying, and some pre-painted ones on e-bay but they were way too expensive.
- Go with products you know, i.e. Gorilla Glue, as opposed to trying something different just to see how it works.
Well that's it! Hope you enjoyed following this build. Leave me some comments.
Tuesday, May 6, 2014
Microarmor AAR
I just got my orders of Litko markers and a few houses from GHQ. Also my lovely significant other was nice enough to bring me some fleece for game mats; green for grass, white for snow, and brown for mud (...not exactly tan for sand/desert) so we had to set it up for a game.
The town:
So mini-me and I got to work cutting out some felt strips for roads, and adding some lego buildings to make a town. (North is to the top)
A larger shot of the town, note the tall "clock tower" in the center built by mini-me.
The Forces:
Force A-mini-me: is comprised of sixteen tanks: 6 Panzer IVs, 10 Shermans.
Force D-me: is sixteen tanks: 8 Panthers, 8 T-34s
A lovely mix of armor. Obviously we're not intending to be historical....this is for FUN!!!!
The Objective:
Force A is to make it through the town, Force D is there to stop them.
The Rules: keep it simple
The Panzers & Panthers are considered heavy tanks. They move 3" per turn. Score a hit on 4-6. Armor saves 4-6.
The Shermans & T-34s are considered light. They move 4" per turn. Score a hit on 4-6. Armor saves 5-6.
You can move and shoot. Fail your armor save & you're dead. Shooting without moving gives you +1. Shooting is line of sight. (Weee! Get the laser pointer out!!!!) Moving off roads slows you 1". Partial cover gives you +1 to your armor save.
Roll to see who goes first each turn.
 |
| Force A approaching the town from the west. All they can see over the hill is the clock tower. They know the town is heavily defended
|
 |
| 6 Panthers are strategically located behind buildings throughout the town while the T-34s patrol the streets. The other two Panthers are positioned on a hill to the south. |
Force A sends four Panzers over the hill to recon. He spots the Panthers on the hill and fires, unfortunately missing.
 |
| The Panthers return fire and score a hit! |
The Shermans come racing over the hill, while the Panthers fire again scoring another hit on a Panzer.
 |
| Two T-34s move into position and take out one Sherman. |
But not before they take out the Panthers on the hill. Mini-me is keeping all his tanks together and the concentrated fire is devastating.
 |
| As the Shermans move through the south part of town the remaining Panthers & T-34s are moving to intercept. |
The Shermans continued to advance in their straight firing line formation taking out the T-34s on the north along with three more Panthers that came out of hiding to fire. I told ya the concentrated fire was devastating.
 |
| At the bend in the road the Force D catches the Shermans in a killing zone. Lots of shooting!! Lots of destruction & fire & smoke too. Heavy losses on both sides. |
 |
| One lone Panzer had stayed back out of the town. The late-comer to the party later took hits from both the Panther and T-34. |
 |
| The last two Shermans break out of the killing zone and make a run for it. |
 |
| They didn't make it. |
 |
| End of game. |
At the end of the game I was left with 3 Panthers and a T-34. Mini-me still had one Panzer left that had moved into position on top of the hill to the south - the original position of two of my Panthers.
Lots o fun!
Subscribe to:
Posts (Atom)


.JPG)


