Chuck

Chuck

Tuesday, August 31, 2021

ORK TRUKK

 Time for the August update on what I did in July. Never did get back to do another July post. I was really too busy on this build.

I've been looking at getting some Kromlech Orks for a long time and finally broke down and spent the money on a trukk.

It took a bit to get here coming from across the big pond and all but I think it was totally worth it. You can judge for yourself once you see the finished model. It came in a big bag with no instructions. Well there were instructions for cleaning and gluing resin parts but no real assembly instructions.


That's okay. Most of the parts were pretty obvious it was just the little parts that I was really unsure where they should go. That's cool though because you can completely customize it however you want. There were options for a flat hood but since I wasn't going to paint it red I went for the turbo dragster look with the blower. 

There was a lot of flash and some big chunks that needed to be removed. Zoom in on the picture above and take a look at the two big poles coming out of the front of the cab! I thought just for a second I may leave them there and sharpen them up but...nah, I like the front grille look better. 


Once I got it all cleaned up and did some test fitting it was time to prime. I've run out of grey primer, my favorite, and decided what the heck I'll try the red primer. I used bit of white glue to put it all together to get a better visual of what I was working with. Then I will disassemble it for painting.

The back hatch had pins so it could open and close but there was no real catch to keep it closed. Bring in the magnets! I cut the pins and replaced them with magnets and inserted one on the body of the trukk to keep it in the closed position.

It worked out really well.

In the test fit I noticed that the cab will be quite crowded once you get the driver and gunner in there. There is some really great detail on the interior and I didn't want to put all kinds of work in on the cab and the figures when you wouldn't see any of it so I magnetized them as well. Make 'em removable.


It's now time to disassemble and start the painting some pre-shading and base coat of dark yellow.

I masked off the interior to prevent overspray of the red and grey camo pattern... 

add a smoke wash, the same dirty dark brown I used on my micro armor....


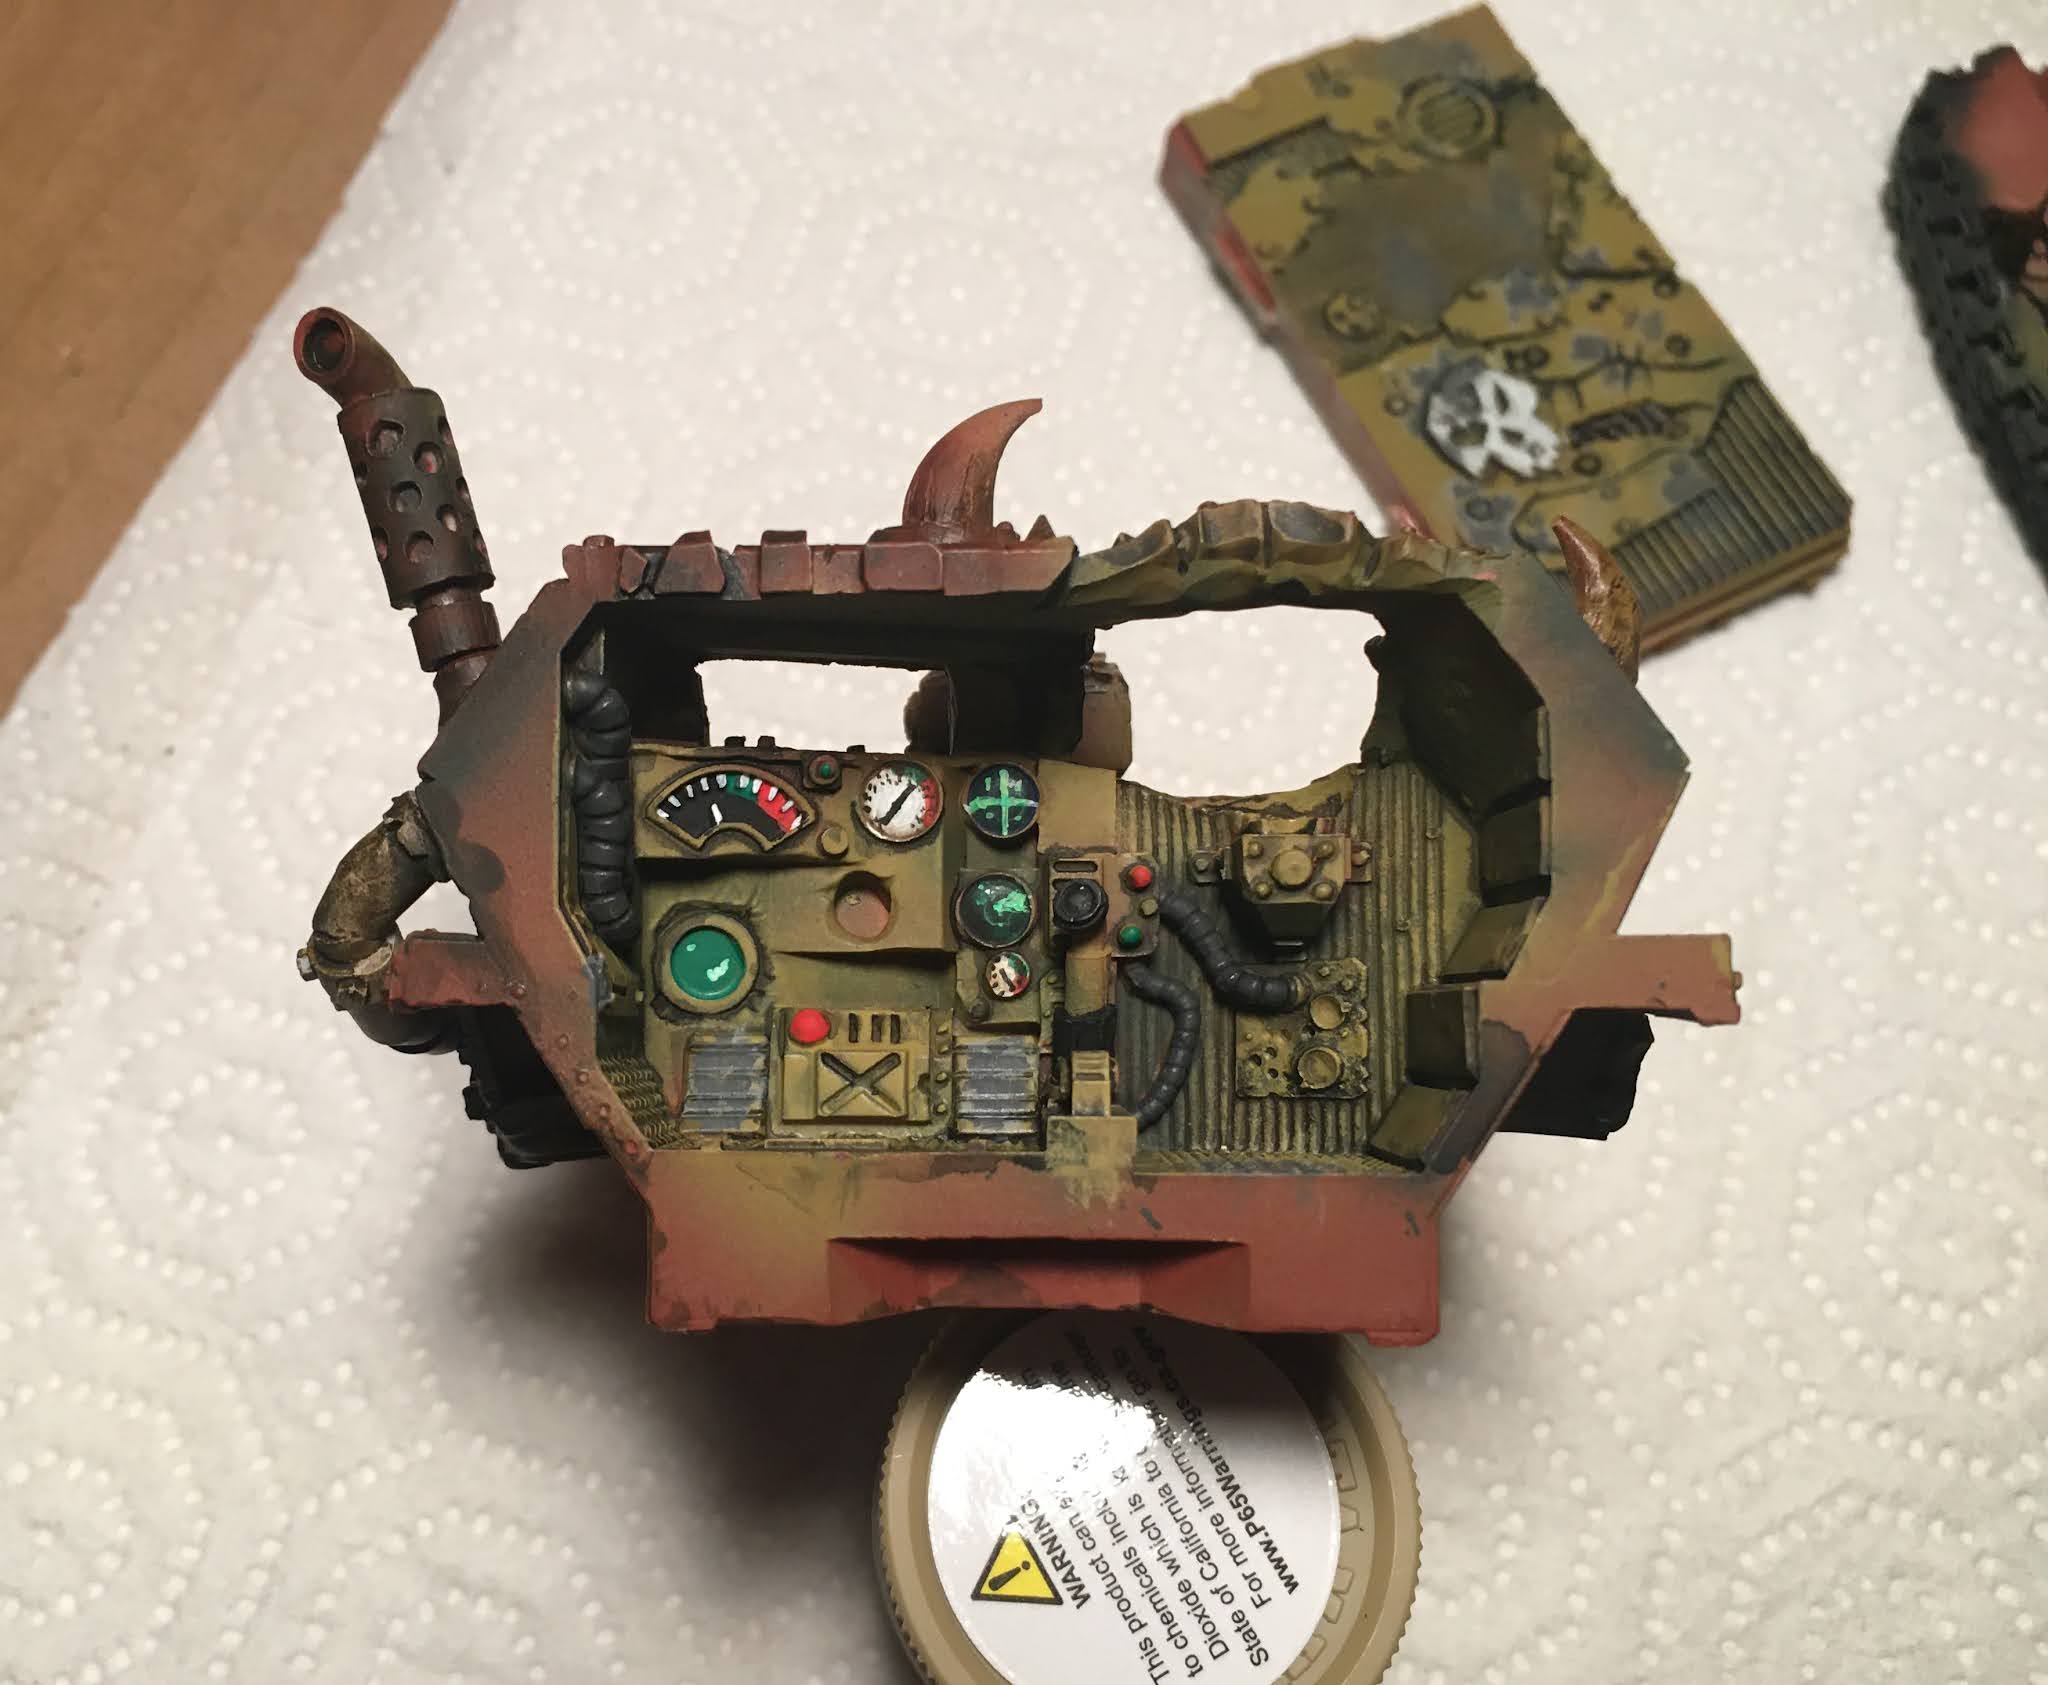
and time to paint the interior details:


I told you there was some good detail inside the cab.
One last look before permanent assembly. I wanted to add a severed head hanging from the center like fuzzy dice but there just isn't the room once the crew gets in there. Too bad 😕

Once assembled it's chipping and exterior detailing time.

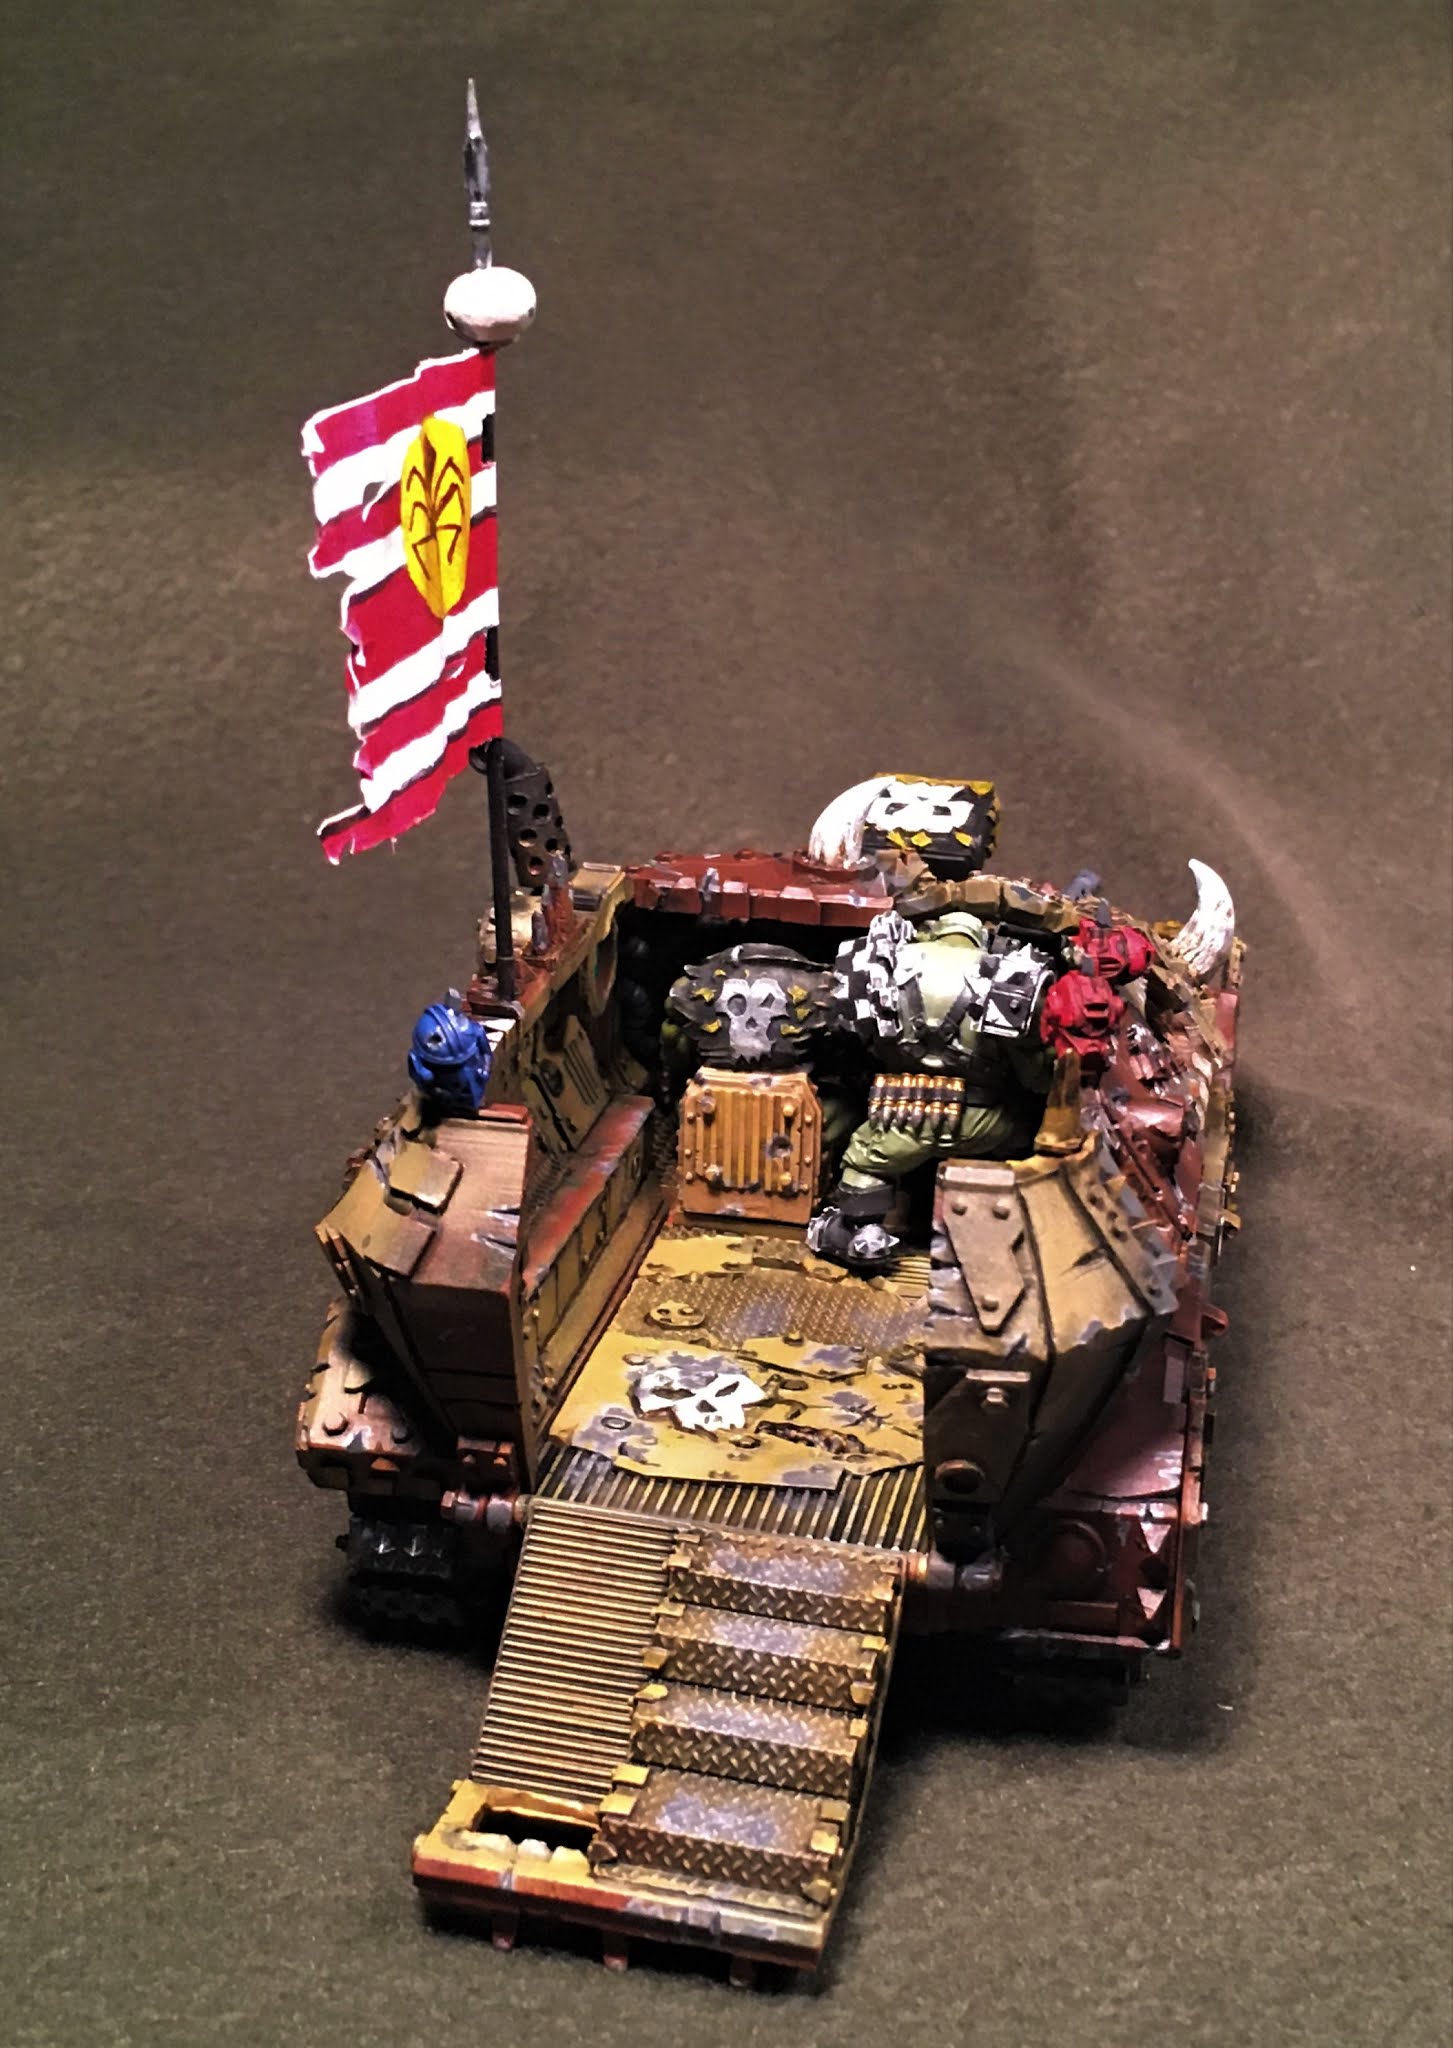
It looked pretty good but it needed something else = a banner!


From here on out I think I'll stop the commentary and just post the final pictures.


Well that's what I did in July. Hope you like it, leave a nice comment if you like.
Thanks for stopping by.


Saturday, July 31, 2021

Delayed June and July - Disclaimer may be NSFW

 Well I totally missed my June post.

I blame it on being distracted by Stanley Cup finals and also being on home Rat Patrol. 

Rat Patrol being on the watch out for evicting non-rent paying rodents from our home.

For the month of June I was working on an Amazon elite/command unit. They are topless. Hence the NSFW disclaimer. I found some really cool minis from Warlord Games. 

These are real Amazon as in South American Amazon as opposed to the Greek mythology Amazons.


I think these are really good looking figures. Well sculpted and when they arrived, almost no flash or mold lines to remove. 


So step by step we go through the painting process:
Start by getting the skin tones down. 


Next up was what to do with the skirts. I had a couple of ideas mulling about and decided on 
the following:

I wanted something bright and vibrant so tried yellow blending with green and orange. Did not turn out exactly like I envisioned but went with it anyway. I also tried some tribal geometric design ---> 
with a black sharpie. That worked out okay. And I also tried to do a blue plaid design on the last pair.

Helmet plumes were done in a similar fashion to somewhat match.


And finally I wanted to add some body art in traditional Amazon designs. I did a few Google searches for the Nat Geo photos of tribal Amazon designs. I won't post pictures of those since they are definitely NSFW pictures. 

It took what seemed like forever to build up courage to do the tattoo or body paint work for fear of messing up and having to completely rework the skin tones. 

After a long time looking at pictures and practicing on plain paper, I finally worked up the nerve and this is the result:


They also came with shields but then they would cover up all the body paint. Plus I didn't want to add anything to take the focus away from all the detail I did on the skirts and face paints. 
So this is the final product:

If you like, leave some comments.

Thanks for stopping by.

I should have another real July post coming in a couple of days.